来源: ASP.NET Core 中 HttpContext 详解与使用 | Microsoft.AspNetCore.Http 详解 – 痴者工良 – 博客园
笔者没有学 ASP.NET,直接学 ASP.NET Core ,学完 ASP.NET Core MVC 基础后,开始学习 ASP.NET Core 的运行原理。发现应用程序有一个非常主要的 “传导体” HttpContext 。
赶忙写一下笔记先。
目录
“传导体” HttpContext
要理解 HttpContext 是干嘛的,首先,看图
图一 内网访问程序
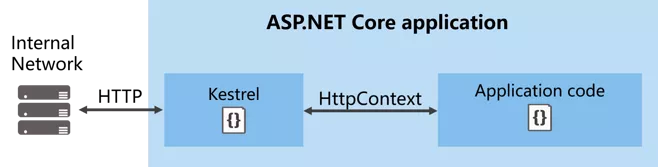
图二 反向代理访问程序

ASP.NET Core 程序中,Kestrel 是一个基于 libuv 的跨平台 ASP.NET Core web 服务器。不清楚 Kerstrel 没关系,以后慢慢了解。
我们可以理解成,外部访问我们的程序,通过 Http 或者 Https 访问,例如 https://localhost:44337/Home/Index,需要通过一个网址,来寻向访问特定的页面。
访问页面时,会产生 Cookie、Seesion、提交表单、上传数据、身份认证等,外部与应用程序之间传导的导体就是 HttpContext。
总之,客户端跟 Web应用程序交互 是通过 HttpContext 传导的。
原理
ASP.NET Core 本质是一个控制台程序!ASP.NET Core 程序并不直接监听请求,而是通过依赖 HTTP Server ,来实现把各自请求转发到应用程序中。这个被转发的请求相当于我们日常浏览网页、上传文件、提交表单等的网络请求,这些请求会被包装,然后组合到 HttpContext 中。
就好像顾客到餐厅吃饭
- 需要先点菜、提出服务要求
- 服务员把你的菜单、需求送到厨房
- 厨师在加工好食品
- 服务员再把食品递给你
HttpContext 相当于这个服务员,她在前、后传递信息。
操作 HttpContext 前期准备
一般来说,我们主要写好Web程序,而无需理会 数据是怎么传导的。就好像两台电脑能够发送资料,我们用不着知道他们是通过无线Wifi、光纤还是铜线电缆传输的。
当有需要时,自然需要用~ 废话少说,先简单操作 HttpContext 了解下。后面接着解析这个对象。
如果你不需要练习,请直接跳过这一节内容。
- 打开 VS(2017)
- 新建项目
- ASP.NET Core Web 应用程序
- Web应用程序(模型视图控制器)
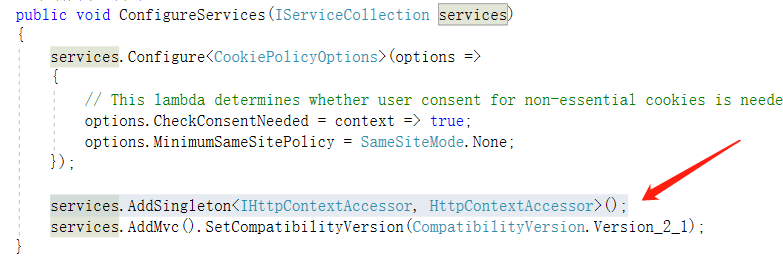
- 打开 Startup.cs ,在 ConfigureServices 中,加上
|
1
|
services.AddSingleton<IHttpContextAccessor, HttpContextAccessor>(); //先不用管这个是干嘛的 |
- 打开 HomeController.cs ,在顶部 using Microsoft.AspNetCore.Http; 把 HomeController 类替换成以下代码

public class HomeController : Controller { private IHttpContextAccessor _accessor; public HomeController(IHttpContextAccessor accessor) { _accessor = accessor; } [HttpGet] public IActionResult Index(int? id) { var httpcontext = _accessor.HttpContext; return View(httpcontext); } } - 打开 Views/Home 目录,删除除 Index.cshtml 外的其它视图
- 把 Index.cshtml 的代码改成
@model Microsoft.AspNetCore.Http.HttpContext
@{
    Layout = null;
}
到这里,准备已经完成。
以上代码的作用是把 HttpContext 对象 传递到 视图 中,直接在视图中使用。这样我们在理解时,只需在视图测试即可。
HttpContext 类型的属性和方法
在 ASP.NET Core 中,系统为每一个请求分配一个线程,HttpContext 针对的,就是一个线程。所以它的类、方法、属性等,都是针对当前请求起作用。
Properties(特性)
| Authentication | 这个已经用不到了,这里只是列一下表。
用于身份认证(ASP.NET中用到),官方不建议在ASP.NT Core中使用。替代方案 Microsoft.AspNetCore.Authentication.AuthenticationHttpContextExtensions |
| Connection | 获取有关此请求的基础连接的信息 |
| Features | 获取此请求上可用的服务器和中间件提供的HTTP特性的集合 |
| Items | 获取或设置可用于在该请求范围内共享数据的键/值集合 |
| Request | 请求 |
| RequestAborted | 通知此请求基础的连接何时中止,因此请求操作应取消 |
| RequestServices | 获取或设置 IServiceProvider 集合,提供访问的请求的服务容器 |
| Response | 响应 |
| Session | 获取或设置用于管理此请求的用户会话数据的对象 |
| TraceIdentifier | 获取或设置用于在跟踪日志中表示此请求的唯一标识符 |
| User | 获取或设置此请求的用户 |
| WebSockets | 获取一个对象,该对象管理此请求的WebSu套连接的建立 |
Item、Session、Response 等对象都是需要经常使用到的,下面笔者会详细实践。
HttpContext 对象实践与测试
Request
用于获取用户请求的对象,浏览器向Web程序提交表单、访问的URL、URL中包含的查询字符串、报文请求头等等。
| Body | 获取或设置 RequestBody 流 |
| ContentLength | 获取或设置 Content-Length 头 |
| ContentType | 获取或设置Content-Type 头 |
| Cookies | 获取或设置 Cookies |
| Form | 获取或设置 表单内容 |
| HasFormContentType | Checks the Content-Type header for form types. |
| Headers | Gets the request headers. |
| Host | 获取或设置主机头。可以包括端口 |
| HttpContext | 获取或设置请求上下文 |
| IsHttps | 检测当前是否HTTPS连接 |
| Method | 获取或设置HTTP方法 |
| Path | 获取或设置当前请求的路径,即URL |
| PathBase | 获取或设置 RequestPathBase,就是URL前面那一段,如https://docs.microsoft.com |
| Protocol | Gets or sets the RequestProtocol. |
| Query | 查询字符串的集合 |
| QueryString | 获取或设置用于在Request.Query中创建查询集合的原始查询字符串 |
| Scheme | 获取或设置HTTP请求方案 |
试一试
打开 Index.Cshtml ,把以下代码加上去
(为了看得清楚一点,我加了表格)
<table>
    <tr>
        <td>RequestBody流</td>
        <td> @Model.Request.Body</td>
    </tr>
    <tr>
        <td>Content-Length头</td>
        <td>@Model.Request.ContentLength</td>
    </tr>
    <tr>
        <td>Content-Type头</td>
        <td> @Model.Request.ContentType</td>
    <tr>
        <td>Cookies </td>
        <td>@Model.Request.Cookies</td>
        </tr>
    <tr>
        <td>IsHttps</td>
        <td>@Model.Request.IsHttps</td>
        </tr>
    <tr>
        <td>Host </td>
        <td>@Model.Request.Host</td>
    </tr>

</table>
运行Web程序,结果如下

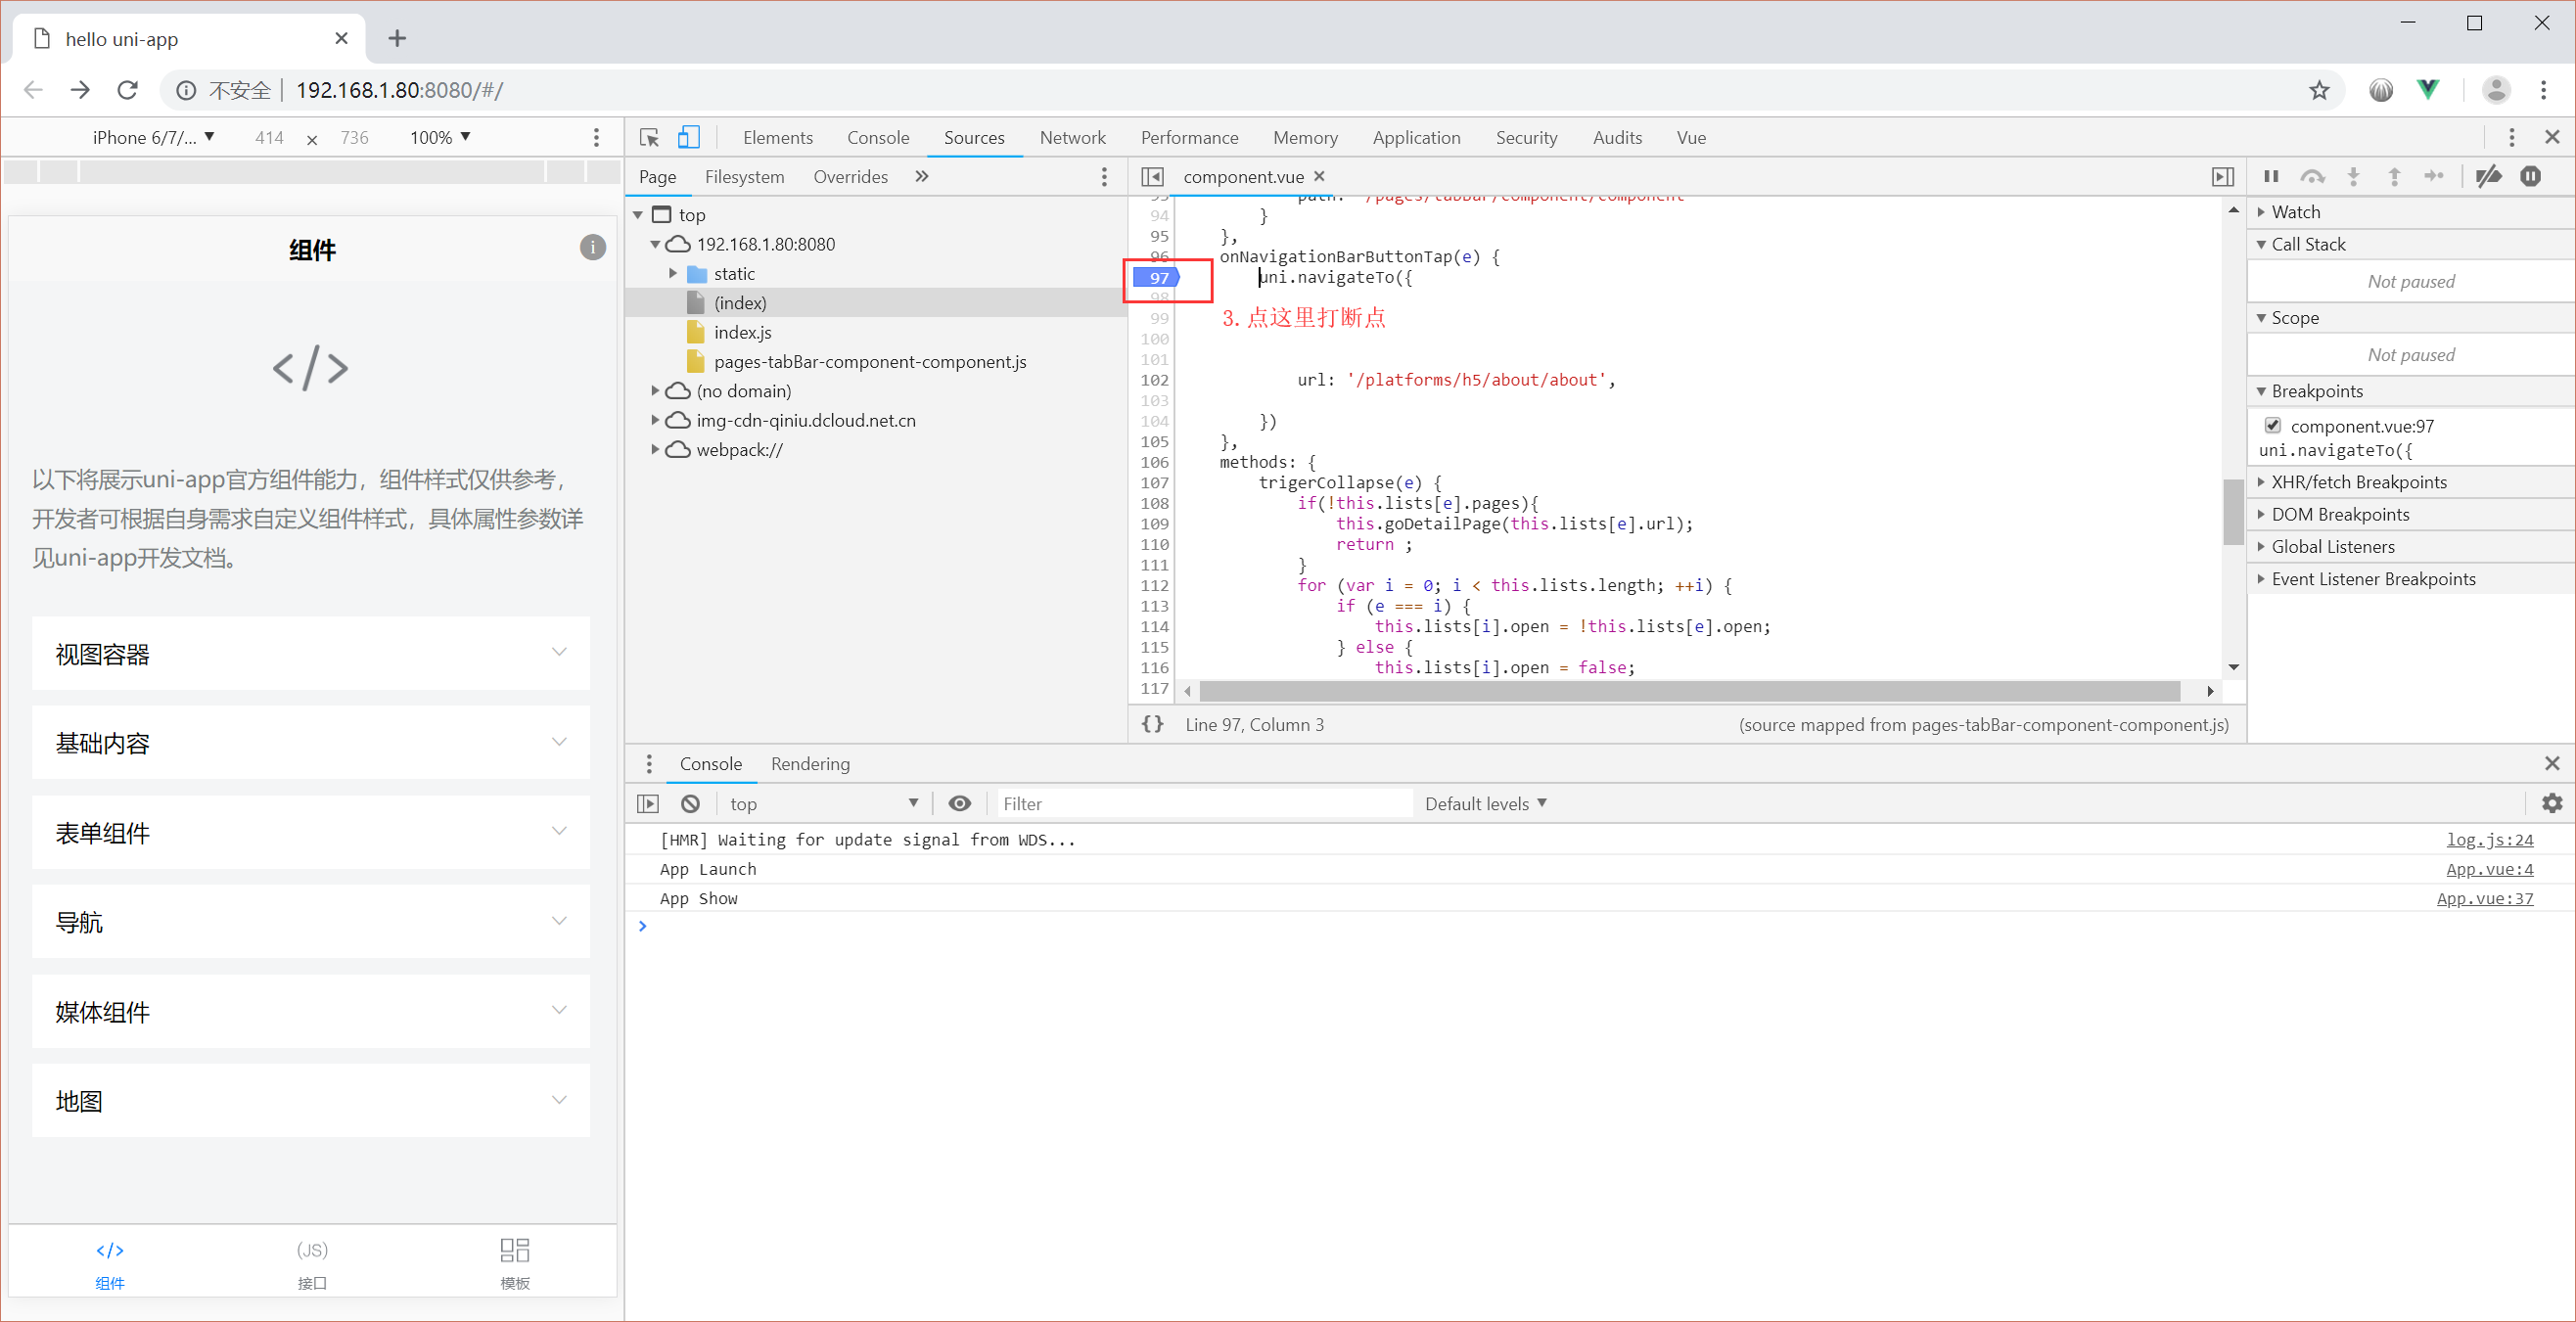
在浏览器 F12 后,可以看到控制台的内容。请查看 下图的 1、3部分
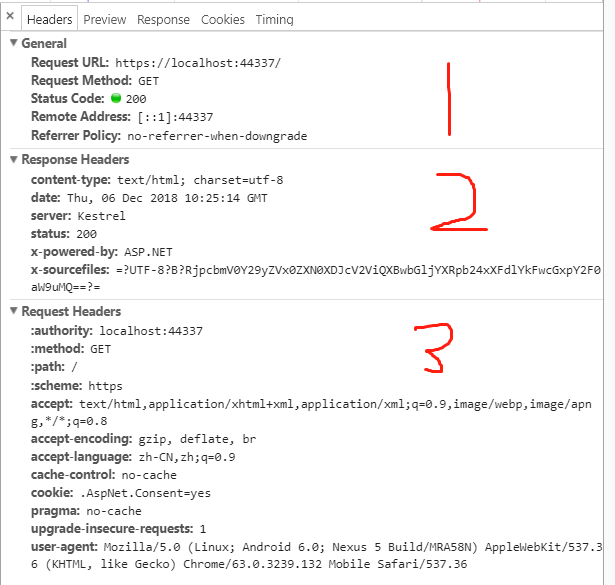
Request 的其它使用方法,就不再赘述,你可以在视图中 @Model.Request. 加上需要测试的属性即可。
推荐别人关于 Request 的文章 https://www.cnblogs.com/Sea1ee/p/7240943.html
Response
Request 是 客户端向 Web 发送请求,而 Response 则是 Web 响应 客户端 的请求。这里笔者就不全部翻译了
使用Response可以直接影响服务器响应,设置响应内容、响应类型(发送网页、文件、图片等)、视图响应前重定向。
Response 应该在控制器中使用。具体使用方法笔者这里就不赘述。
| Body | 获取或设置响应体流 |
| ContentLength | Gets or sets the value for the Content-Type response header. |
| ContentType | 获取或设置内容类型响应标头的值 |
| Cookies | 获取一个对象,该对象可用于管理此响应的Cookie |
| HasStarted | Gets a value indicating whether response headers have been sent to the client. |
| Headers | Gets the response headers. |
| HttpContext | Gets the HttpContext for this response. |
| StatusCode | Gets or sets the HTTP response code. |
Response 的方法
| OnCompleted(Func<Task>) |
在响应已发送到客户端之后添加要调用的委托 |
| OnCompleted(Func<Object,Task>, Object) | 响应已发送到客户端之后添加要调用的委托 |
| OnStarting(Func<Task>) | 在响应头将被发送到客户端之前添加要调用的委托 |
| OnStarting(Func<Object,Task>, Object) | 在响应头将被发送到客户端之前添加要调用的委托 |
| Redirect(String) | 向客户端返回一个临时重定向响应(HTTP 302) |
| Redirect(String, Boolean) | 向客户端返回重定向响应(HTTP 301或HTTP 302) |
| RegisterForDispose(IDisposable) | 处置(不可分)在请求完成处理后,注册主机处理的对象 |
Response 拓展方法
| GetTypedHeaders(HttpResponse) | |
| WriteAsync(HttpResponse, String, Encoding, CancellationToken) | 取消令牌使用给定的编码将给定文本写入响应体 |
| WriteAsync(HttpResponse, String, CancellationToken) | 将给定文本写入响应体。UTF-8编码将被使用 |
| Clear(HttpResponse) | |
| SendFileAsync(HttpResponse, IFileInfo, Int64, Nullable<Int64>, CancellationToken) | 使用Sendfile 扩展发送给定的文件 |
| SendFileAsync(HttpResponse, IFileInfo, CancellationToken) | Sends the given file using the SendFile extension. |
| SendFileAsync(HttpResponse, String, Int64, Nullable<Int64>, CancellationToken) | Sends the given file using the SendFile extension. |
| SendFileAsync(HttpResponse, String, CancellationToken) | Sends the given file using the SendFile extension. |
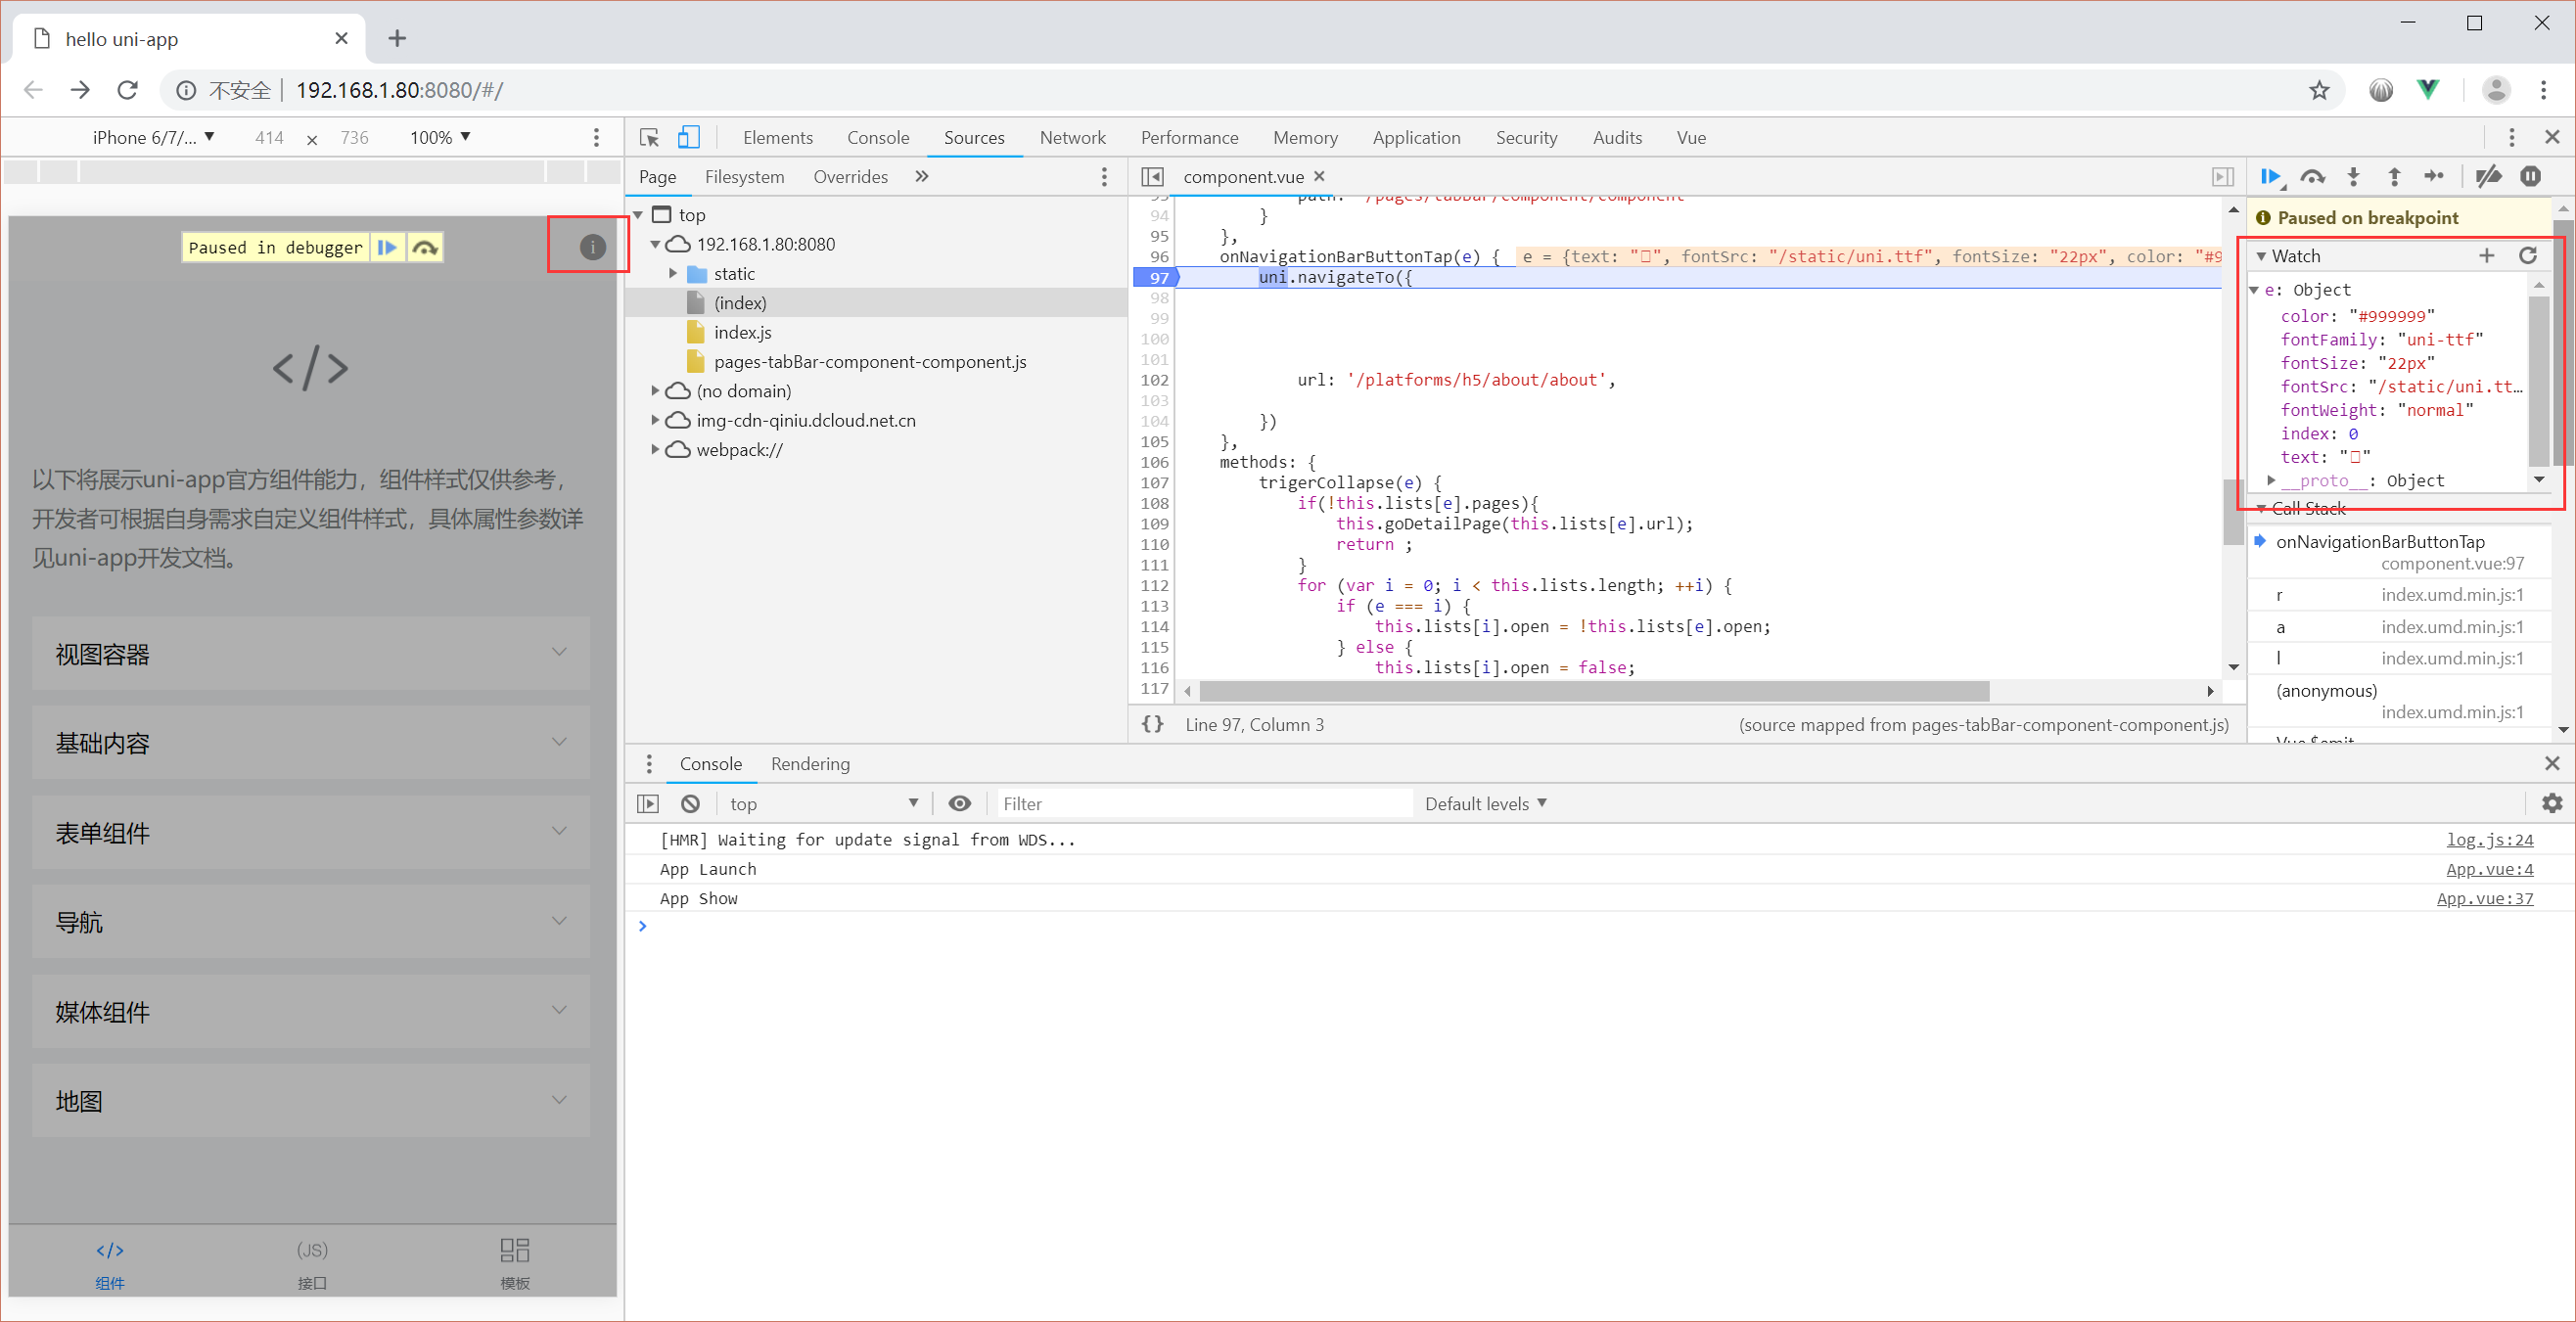
请参考下图的第 2 部分

Item
如果你使用过 ViewData,就不难理解 HttpContext.Item
HttpContext.Item 是一个字典集合类型,具体类型为 IDictionary<TModel,TModel>。它的使用方法像 ViewData。(不要跟我说说你不知道 ViewBag、ViewData 是什么~)
打开 Index.Cshtml ,用下面代码复制替换
@model Microsoft.AspNetCore.Http.HttpContext
@{
    Layout = null;
}
@{
    List<string> i = new List<string>();
    i.Add("a");
    i.Add("b");
    i.Add("c");
    i.Add("d");
    i.Add("e");
    i.Add("f");
    i.Add("g");
    i.Add("h");
    i.Add("i");

    Model.Items["Test"] = i;
    /*
        Model.Items 是字典类型
        这里设置 键 Test
                 值 i ,它的值是 List<string> 类型
    */

foreach(var item in Model.Items["Test"] as List<string>) //字典类型,必须先用 as 转为对应类型
{
    <br> @item

}
}
结果
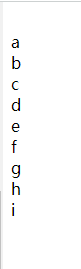
可以用 HttpContext.Item 来存储当前请求的意向有用的数据。
HttpContext 的其它方法使用这里不再赘述,需要注意的是,HttpContext 是针对一个请求的而产生的。